Once you have a Screen element in your flow and have configured one or more EDQ Validation components it's likely that you will want to use the validated contact data to create or update a record.
As an example, here are the steps to create a new Contact record with a validated Mailing Address, Email and Mobile.
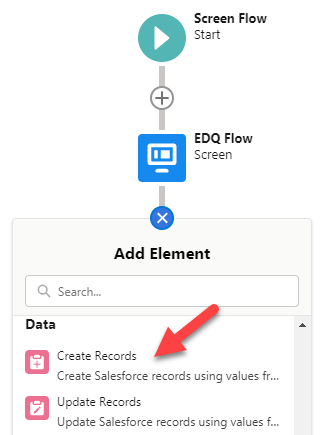
Click the + icon beneath the new Screen element and add a Create Records element.

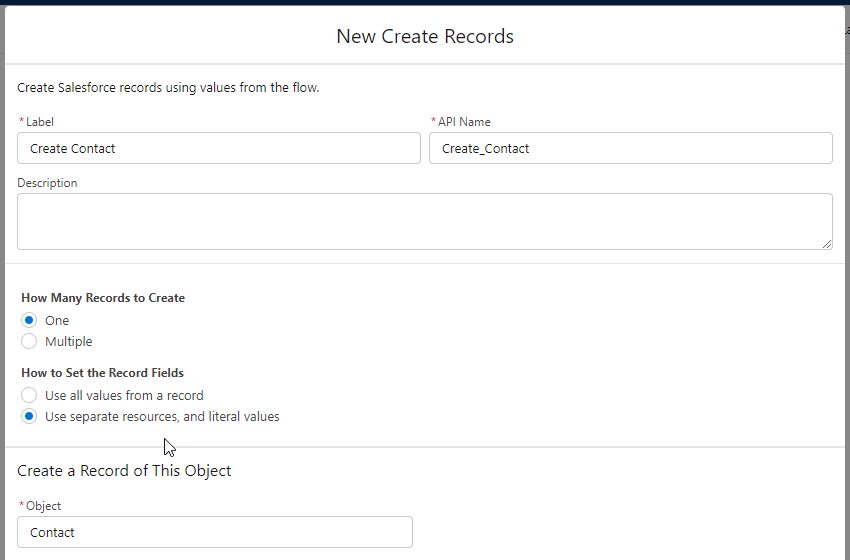
Give the element a Label and the API Name will be populated automatically.

Under How to Set the Record Fields select Use separate resources, and literal values.
For the Object field, search and select the Contact object.
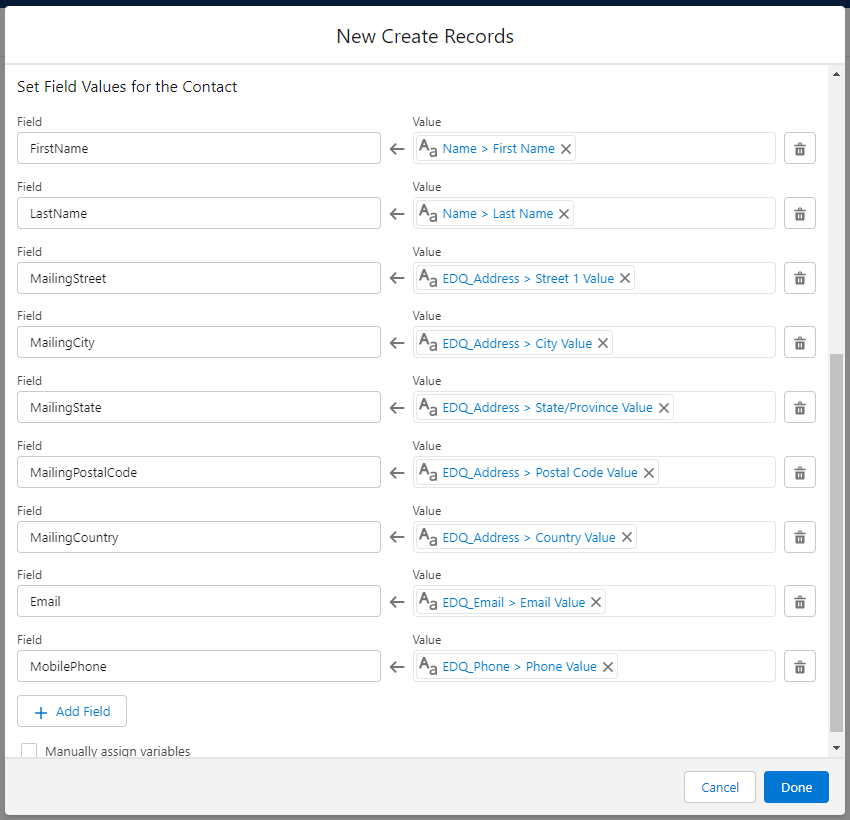
Assign values from the EDQ Validation Screen Components to fields in the Contact object.

For the EDQ Address Validation component map the following values to the appropriate MailingAddress field of the Contact object:
If instead you were creating a record which contains one of the new Salesforce Custom Address Fields, make sure to use the subfields, indicated with a __s at the end of the subfield name as shown in the example below. Note also the use of the State Code and Two-letter Country Code values.

If instead you were creating an object with custom fields to represent an address and wanted to separate the street fields you would enable the Use Split Fields setting on the EDQ Address Validation component and map each of street1Value, street2Value and street3Value to the separate street fields of your custom address, e.g.

For the EDQ Email Validation component map the emailValue value to the Email field of the Contact object.
For the EDQ Phone Validation component map the phoneValue value to the MobilePhone field of the Contact object.
Click Done to save the element.
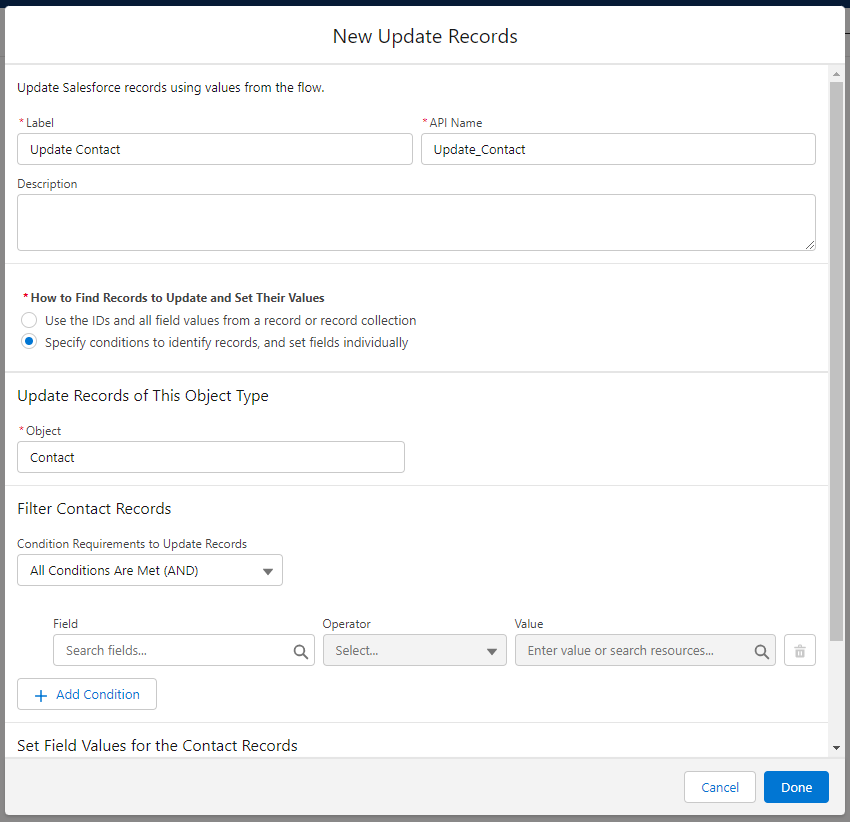
The process is essentially the same as for creating a new record but you need to specify conditions to identify the record(s) you want to update and then set the fields individually as for the create scenario above.
