To integrate address/phone/email validation, you have to specify the form with the field(s) you want to be used. In most cases, this will be a registration or contact form on your website that your customers will use to enter their contact details.
To create an integration, you can either:
or
Paste the HTML code of the form you want to use starting with the <form> and ending with the </form> tags. For example:
<form>
    <label>Name</label> <input type="text" name="forename">
    <label>Surname</label> <input type="text" name="surname">
    <label>Email</label> <input type="text" name="email">
    <label>Phone</label> <input type="text" name="phone">
    <label>Street1</label> <input type="text" name="street1">
    <label>Street2</label> <input type="text" name="street2">
    <label>City</label> <input type="text" name="city">
    <label>ZIP Code</label> <input type="text" name="zipcode">
    <label>State</label> <input type="text" name="state">
</form>
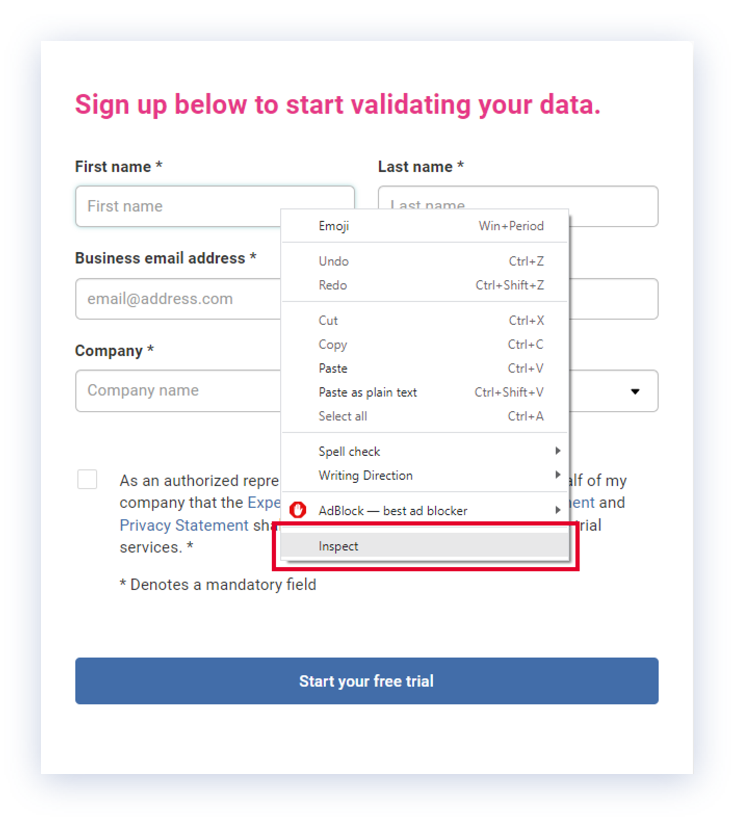
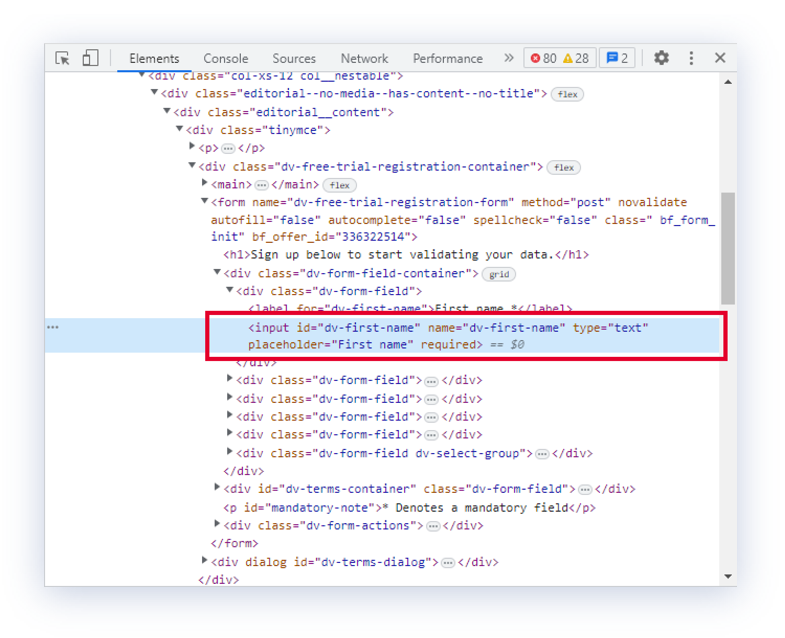
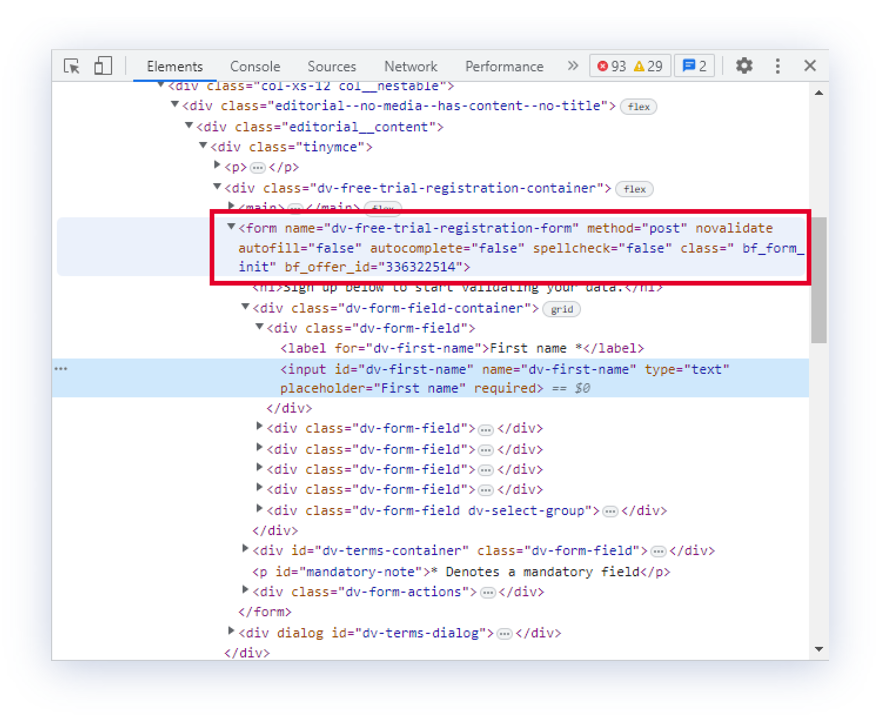
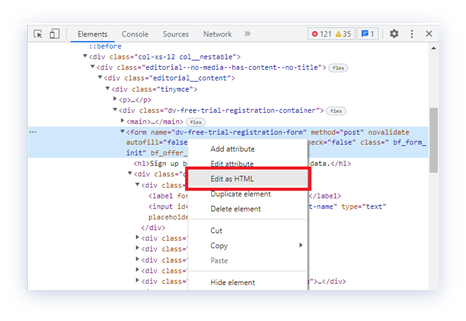
<form name and end with </form>) then right-click and select Copy or click CTRL+C to copy the form code: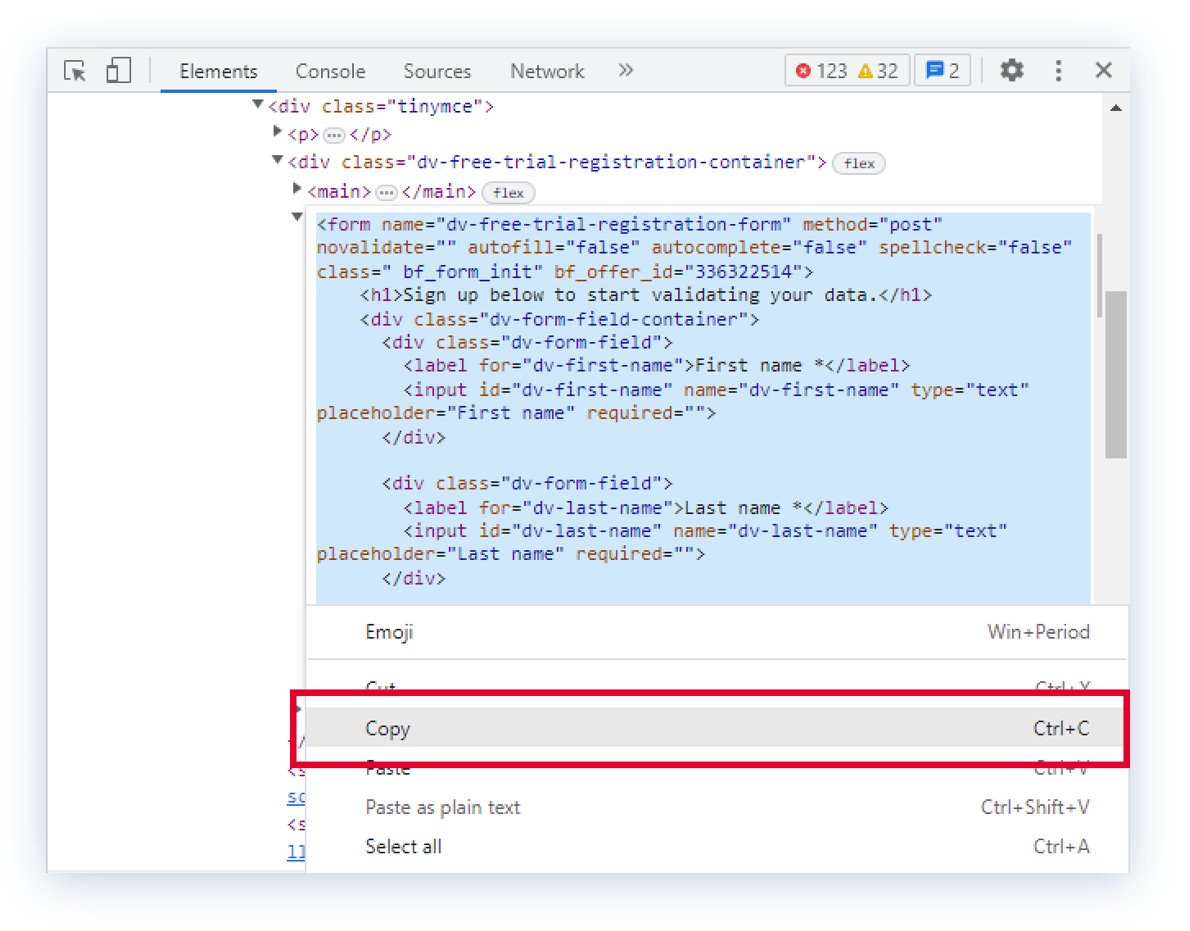
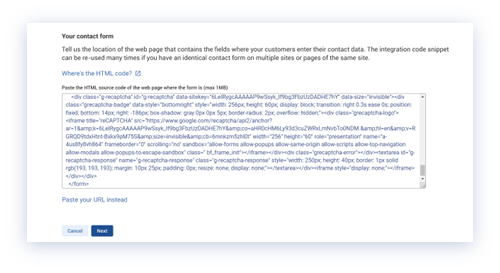
You can integrate address, phone, and email validation into up to 2 forms within a web page. To do so, ensure that each form is separate and has a unique ID. For example:
<form id="">
    <label>Name</label> <input type="text" name="forename">
    <label>Surname</label> <input type="text" name="surname">
    <label>Email</label> <input type="text" name="email">
    <label>Phone</label> <input type="text" name="phone">
    <label>Street1</label> <input type="text" name="street1">
    <label>Street2</label> <input type="text" name="street2">
    <label>City</label> <input type="text" name="city">
    <label>ZIP Code</label> <input type="text" name="zipcode">
    <label>State</label> <input type="text" name="state">
</form>